 I still have a ton of Swiss Chard in my garden despite the fact that we have had several hard frosts. I love the cold tolerant greens because you can enjoy them long into the winter weather. Last year I was brushing snow off the kale and eating it raw. Not for everyone, I know, but for me it was like getting a shot of summer in the dark, dreary winter days. Many greens get sweeter as it gets colder which is an added benefit.
This recipe features several Anti-Angiogenic Foods and is great at any meal. My parents raise chickens for their eggs and I have to say, this swiss chard saute is heavenly with some good organic scrambled eggs.
Ingredients:
1 Tbs olive oil, coconut oil, or butter (whatever you prefer)
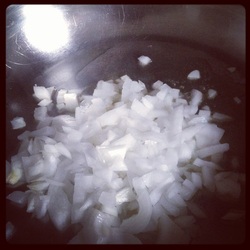
1/2 large white onion, chopped
2-3 large cloves of garlic, minced
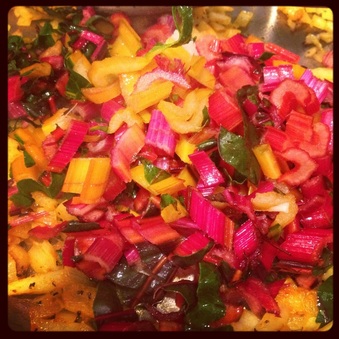
5-6 large leaves of Swiss chard, stripped and chopped (i.e removed the stems... but keep them)
5-6 Swiss chard stems,the ones you removed from the last step, chopped :)
2 tsp Turmeric
1/2 tsp Black Pepper
Salt to taste (I love Herbamare a salt and seasoning blend available at natural food stores)
Directions:
Heat a large skillet over medium/high heat. Add olive oil, coconut oil or butter to the skillet. Add onions and garlic and saute for several minutes until translucent. Add chopped Swiss Chard stems, turmeric and black pepper. Reduce heat and allow to soften. This process takes several minutes. See picture below.
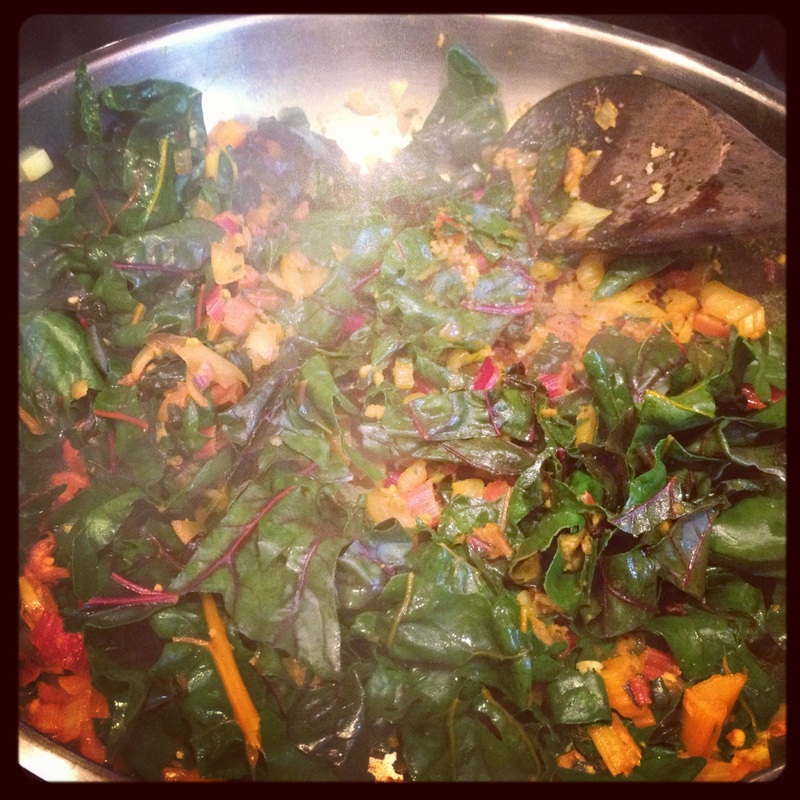
 Once the Swiss Chard stems are softened, add the chopped green leaves of the Swiss Chard. This part wilts very quickly when exposed to heat and is very similar to lettuce. I like my veggies a little crunchy so it's really up to personal preference how long you cook them during this step. If you like them very soft, you will need to keep them on longer.
For me, it only takes about 2-3 minutes.
After the greens have wilted to your liking, add salt to taste and enjoy!
Like I said, this recipe is great with scrambled eggs but would be equally delicious with brown rice even on it's own.
Enjoy!
-- Shelly
Recently, I went to a fabulous gluten free cooking class at Good Harvest Market taught by the amazing Nikki Jencen. Luckily, Nikki and I have similar opinions regarding gluten free cooking... focus on things that are naturally gluten free. For those of you that don't know, I was recently diagnosed with gluten intolerance which in essence means I will no longer be eating gluten containing grains and foods... for the rest of my life. In my search for new foods that I will enjoy, it quickly became evident that many of the "Gluten Free" products that are available in the markets are highly processed, junk foods and they are not items that I personally feel would benefit my diet in any way. The good news is many of the foods that I love like vegetables, fruits, nuts, seeds, and whole grains like quinoa, millet and brown rice are already gluten free. Epiphany!!! My life is definitely not over yet!
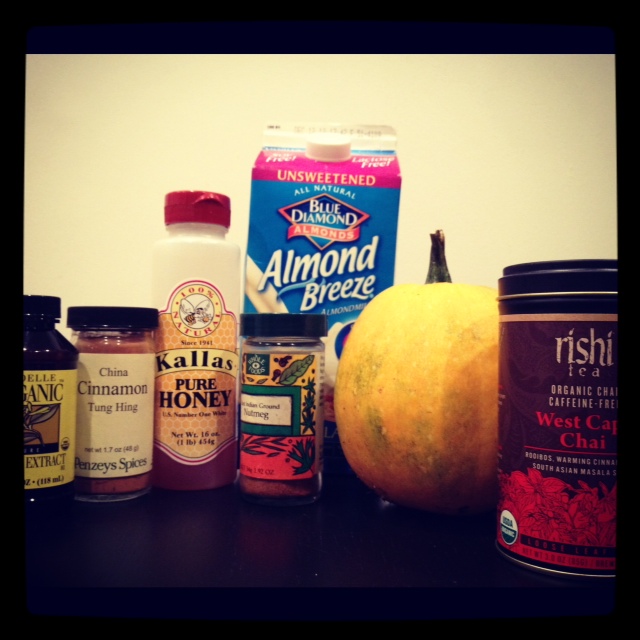
This was the first recipe we made in the cooking class and I made sure to sip very slowly so that it lasted through the entire class. During the past six days I have made this recipe twice. This would be great with home-made almond milk but I don't always have time for that. Just make sure you get the unsweetened variety of whatever non dairy milk you are purchasing.
Ingredients:
3 cups Almond Milk or other non-dairy milk (If you like regular milk you could use that too.)
2 tea bags of your choice (Early Grey, English Breakfast, Chai or Cinnamon/Ginger are all great)
1 Tbs. Vanilla Extract
1/2 can pumpkin puree (about 1 cup if you are roasting your own)
1 tsp. pumpkin pie spice
1 tsp. cinnamon
1-2 Tbs raw honey
1/2 tsp. nutmeg
Directions:
Place a medium sized sauce pan over medium heat. Add almond milk and tea. Heat until steaming but not yet boiling. While the tea is steeping in the almond milk, place pumpkin, spices, vanilla and honey until a bowl. Whisk together until thoroughly combined. When almond milk is hot and the pumpkin mixture is ready, whisk the pumpkin mixture into the warm almond milk. Pour into mugs and enjoy!
Tips from Shelly: I am a big fan of caffeine free teas and Rishi Tea Company makes a great caffeine-free Chai blend that is delicious in this recipe. This would also be super cute served at Thanksgiving in a mug with a cinnamon stick and a dollop of coconut "whipped cream."
Not only is pumpkin an Anti-Angiogenic Food, it's also a great source of Vitamin A, Zinc, Magnesium and Fiber.
Enjoy!
--Shelly
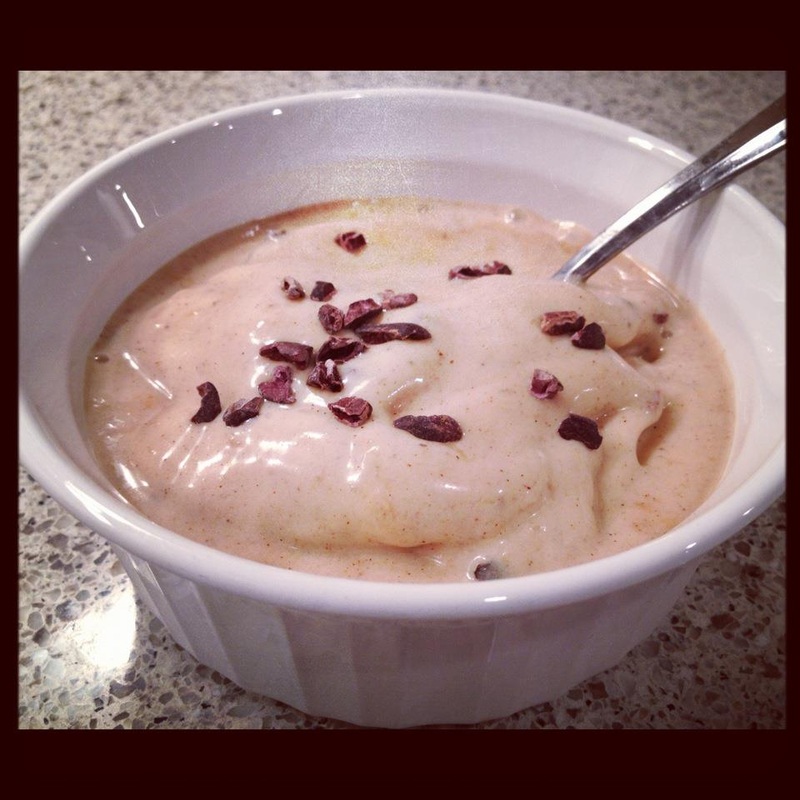
Serves Two
Ingredients:
4- Frozen Bananas, cut into chunks
1/2 cup-3/4 cup Unsweetened Almond Milk
1-2 Tbs Almond Butter
1/2 teaspoon Ground Cinnamon
2 Tbs Cacao Nibs
Directions:
Place bananas, 1/2 cup of almond milk, almond butter and cinnamon into a food processor. Process until creamy and smooth. You may need to add additional almond milk until desired consistency is reached. If you want it a little softer or if you want to enjoy it like a shake, you can add more almond milk.
Sprinkle with cacao nibs and serve immediately. This is something you want to eat fairly quickly after you make it. I wouldn't plan on refreezing it just because it doesn't hold up the best.
Tips from Shelly: As soon as your fresh banana's begin to freckle and are no longer desirable to eat fresh but are still relatively firm, peel them and place in a gallon size freezer bag and keep in the freezer. You can also sometimes purchase them on discount at your local markets. They make awesome ice"cream" and are a nutrient rich addition to smoothies.
The options for this recipe are endless once you have the main idea down. You can make Raspberry Cashew, Banana Peanut Butter, Blueberry Coconut and many other variation just by switching out the nut butter and leaving out the cinnamon, if desired.
Enjoy!
--Shelly
It doesn't take people long to realize I am in the midst of a passionate love affair with Kale. Lacinato, Curly, Red Russian, Purple... it doesn't matter. I love it. It's great in smoothies, soups, stewed, sauteed and baked into kale chips. One of the most difficult ways to eat it is raw just because it can be quite tough. Kale offers substantial amounts of Vitamin A, K, C and various trace minerals. It's even high in calcium (mooove over milk)! Kale, the king of the dark leafy greens, has also made the list of the top 30 Anti-Angiogenic foods. Anti-Angiogenic foods are foods that have been proven to help cut off blood supply to cancer cells and tumors. In essence this foods contain cancer fighting properties.
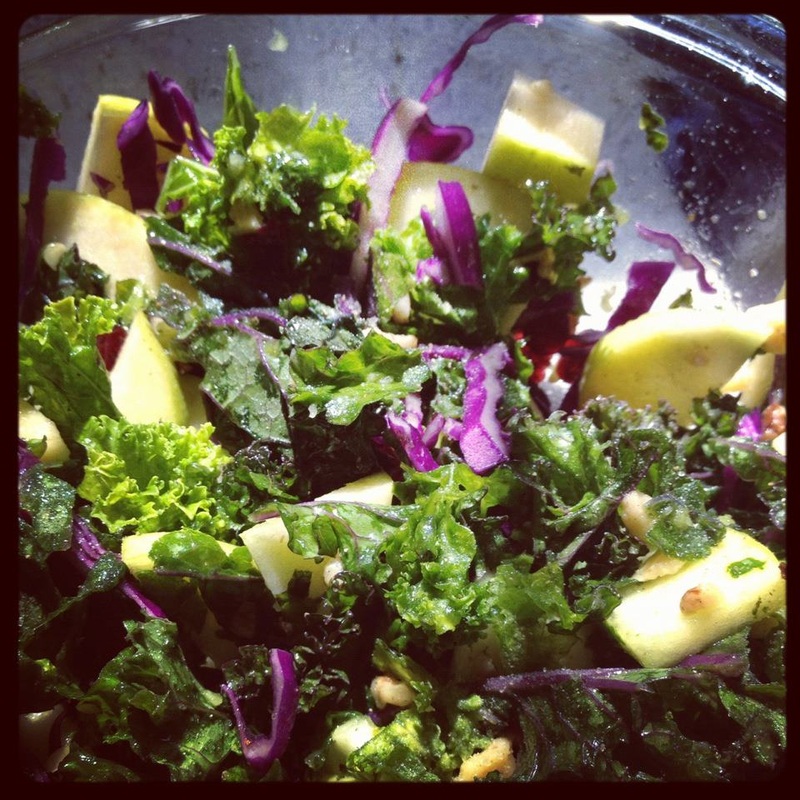
This recipe is inspired by the Kale-abration Salad from NuGenesis Farms in Delafield, WI. My husband and I prefer the 2-3 cloves of garlic because it tastes a little spicy. If you don't absolutely love garlic, I would suggest just using one clove.
8 cups chopped kale
2-3 cloves of garlic finely minced
2 Tbs. olive oil
3 Tbs. honey
1/2 tsp. salt (or to taste)
1/3 cup currant, raisins, dried cranberries or dried cherries
1/3 cup chopped walnuts or other nut of choice
2 apples, chopped
Place kale, oil, honey, garlic and salt into a large bowl. With clean hands, massage everything together. After a few moments you will see and feel the kale turning softer and more tender. You can stop massaging whenever the kale reaches the texture you enjoy. The more you massage, the softer it gets. The softer it gets, easier it is to chew. When the desired texture is reached, add all other ingredients and toss gently.
Don't be afraid to add other vegetables. In the recipe above, I added some finely sliced purple cabbage. Jicama, shredded carrots, avocado, sliced onions or any other vegetable of your choosing would most likely be delicious, as well.
Enjoy!
--Shelly
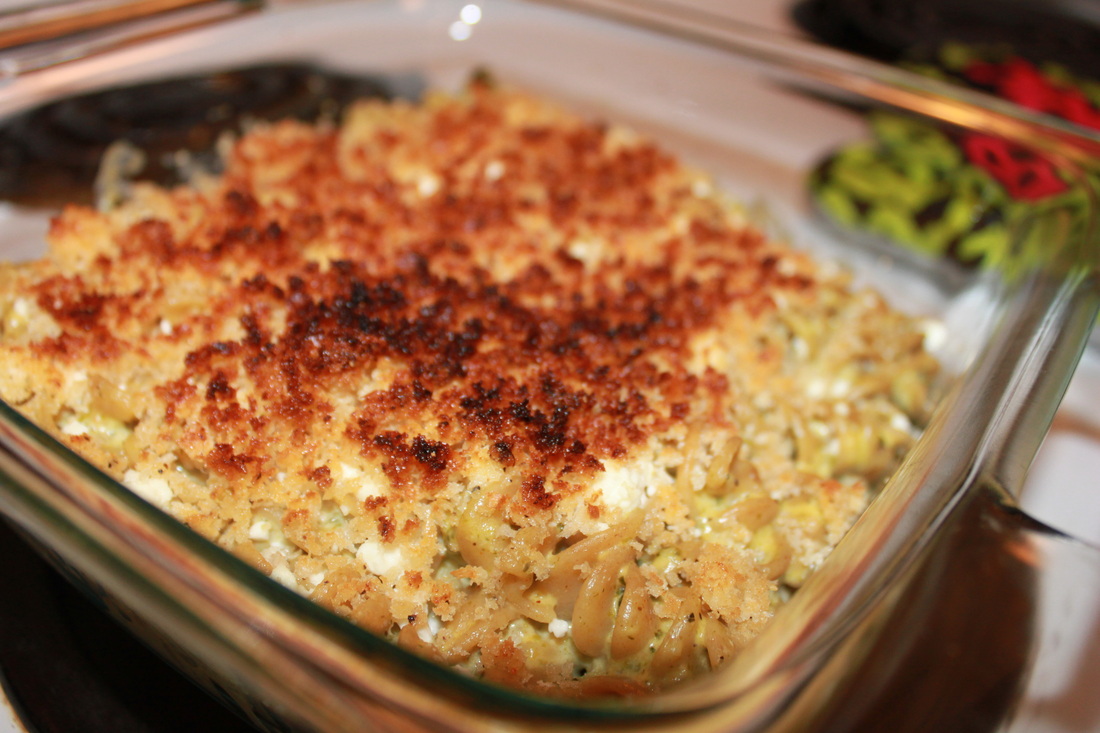
My coworker Jen gave me some peppers from her garden so I thought I'd make my favorite green chile mac and cheese with them! I've gotten pretty good at hiding vegetables in food since my boyfriend Andrew is a little picky about his veggies. And mac and cheese is a great medium for hiding vegetables or just adding them in, considering it's not the healthiest entree to begin with! My favorite veggies to add to mac and cheese include spinach, onions, carrots, and collard greens, but this recipe's use of peppers gives it a wonderful heat! Try it out and make it your own! Also, I almost never measure ingredients when I'm just cooking so I apologize for the lack of preciseness of this recipe! Ingredients: - At least two whole chile or poblano peppers
- olive oil
- whole grain pasta
- milk
- cream cheese
- your favorite cheeses (I used colby jack & feta, but a sharp white cheddar would also be wonderful with this)
- onion, diced
- garlic, minced
- panko bread crumbs
- butter
- cayenne pepper
- salt
- pepper
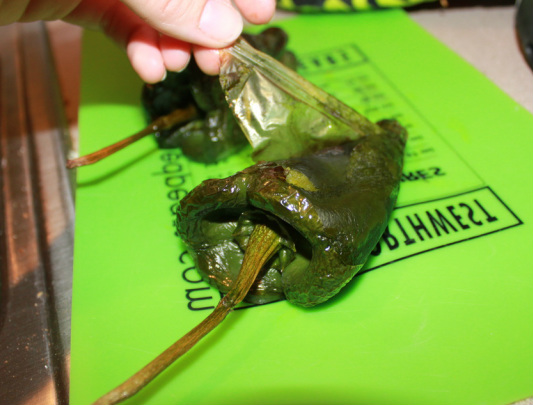
Directions: - Rub the outside skin of the peppers with a small amount of olive. Roast the peppers whole in an oven at 425 F for about 20 to 30 minutes or until the outside skin of the peppers is slightly charred.
- While the peppers are roasting, boil the water for your pasta and cook according to the package directions. In a small pan, saute the onions in a small amount of olive oil (just enough to coat the bottom of the pan) until they turn translucent. Add the garlic and saute for a minute or two more (you don't want to overcook the garlic or it will turn bitter).
- When the peppers are done roasting, let them cool for a few minutes. Then carefully peel off the thin outer layer of skin as shown below:
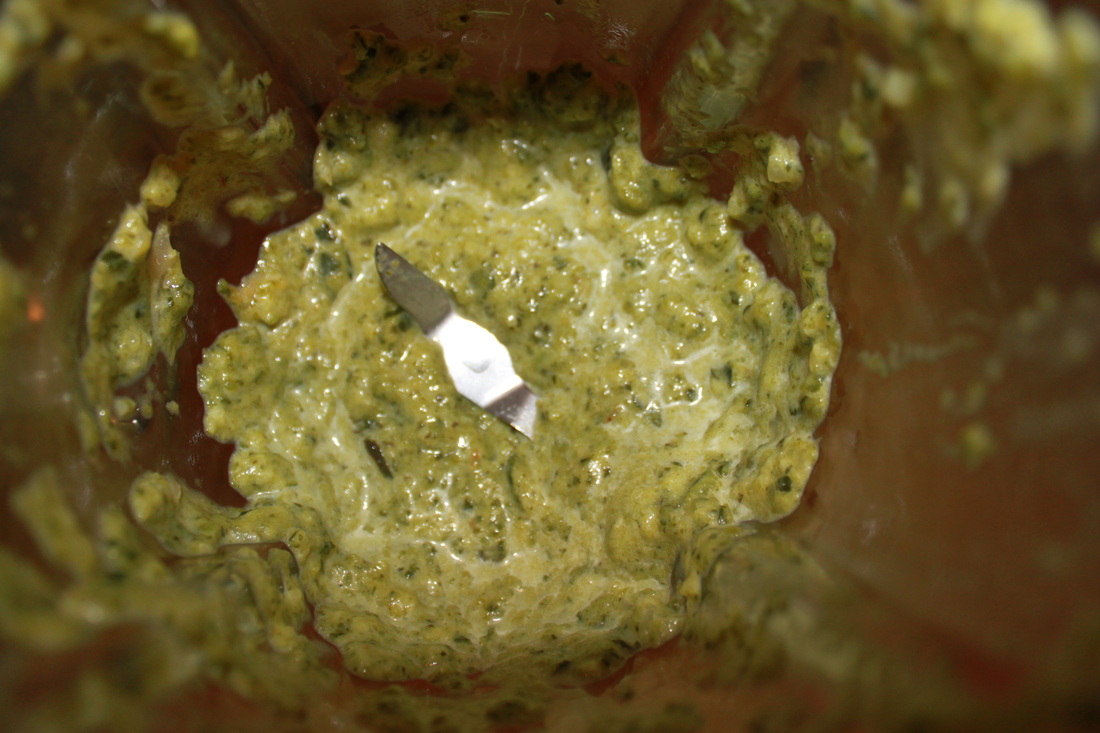
- After the skin is peeled, gently pull the stem of the pepper to pull out the ribs and seeds. You'll want to cut (or pull, the roasted peppers are quite fragile) the pepper in half and gently wipe out the rest of the seeds. Then throw the peppers and onions and garlic (if you'd like them to be pureed as well) into a blender with about 1/4 to 1/2 cup milk.
- Pour the entire mixture back into the pan you used to saute the garlic and onions. Add your choice of cheeses (I used about 4 oz. of cream cheese plus 3 oz. of colby jack) and stir the mixture over low heat until completed melted. Add salt and pepper to taste. (I added some cayenne pepper for some extra heat as well. If you didn't use onion or garlic you could also use onion powder and garlic powder for extra flavor!)
- When your pasta is done, drain it and pour into a baking dish. Pour the sauce mixture over the pasta and mix to combine.
- To add some crunch, melt a tablespoon of butter and mix with about a 1/2 cup of Panko bread crumbs. Sprinkle over the top of the pasta. (I also sprinkled feta on top!)
- Throw under the broiler for about 2 to 3 minutes or until the breadcrumbs are nicely browned! Serve and enjoy!
-- Amy
|
 RSS Feed